Sign up for our weekly newsletter and never miss a sale! Sign up here!
Sign up for our weekly newsletter and never miss a sale! Sign up here!
Sign up for our weekly newsletter and never miss a sale! Sign up here!
Sign up for our weekly newsletter and never miss a sale! Sign up here!
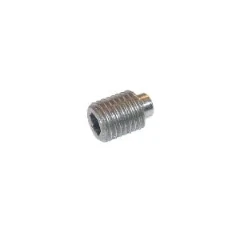
First and foremost, know and remember this; the thread on the Collet Alignment Screw is 1/4″-32. The importance and explanation is in a following paragraph.
If you stick your index finger up inside the spindle about three inches, you’ll find the Collet Alignment Screw and chances are, it’s worn. If all you feel is a “mushroom head”, it’s really worn. If you don’t feel anything, it’s most likely broken off. It should extend into the spindle about 3/32 of an inch with a nice sharp dog point. Not a week goes by that we don’t ship at least a dozen Collet Alignment Screws, sometimes more.
Exactly what does it do? When the leading edge of your cutting tool engages the work piece, a force of equal magnitude is experienced at the interface between the tool and the collet. Were it not for the Collet Alignment Screw, and a properly tightened drawbar, your collet could spin inside the spindle, possibly even friction welding the collet to the spindle.

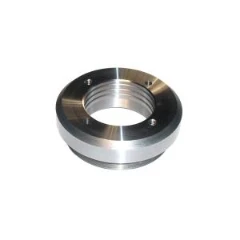
Changing the Collet Alignment Screw is about a 15 minute job if you do it the easy way. The first thing you want to do is locate the set screw on the back side of the quill. Put a mark on the nose piece as shown in the picture and then remove the set screw with a 1/8 inch allen wrench. Insert the pins of a adjustable face spanner wrench into the two holes on the bottom of the nose piece and unscrew it. (It has a right hand thread.)
After removing the nose piece, return the quill to the home position and set the quill lock. Put the drawbar back in and, using a soft-blow hammer, start driving the Spindle down and out of the quill. It only needs to be driven down about an inch or so. Stop as soon as you can see the opening to the Collet Alignment Screw.

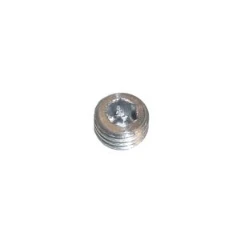
Using the 1/8 inch allen wrench, remove the Jam Nut by turning it counter-clockwise. Be careful as you remove it as it is very small and will fall off the allen wrench very easily. Remember, at the beginning, I mentioned that the thread we’re dealing with is 1/4″-32. That is a very fine thread and it is susceptible to damage so DON’T TRY TO UNSCREW IT, as you did with the Jam Nut. Instead, insert and turn the allen wrench forward, or clock-wise. This will thread the damaged Alignment Screw into the Spindle. When the screw clears, hold your hand under the spindle and withdraw your allen wrench; the Alignment Screw will fall into your open hand.
Thread the new Collet Alignment Screw in until it just emerges inside the spindle. Slide a collet up into the spindle until it seats, then continue screwing in the Collet Alignment Screw until it touches. Back the screw out 1/2 turn and install the Set Screw. Test with the collet one more time just to make sure the Alignment screw is located correctly.
Use your soft-blow hammer to gently tap the spindle back up into the quill until the upper bearing touches. Install the nose piece until the mark you made on it aligns with the set screw opening. Insert the set screw. DO NOT OVER TIGHTEN the set screw. If you do, it will change the shape of the quill and it will stick as you move it to the full up, or home position.